
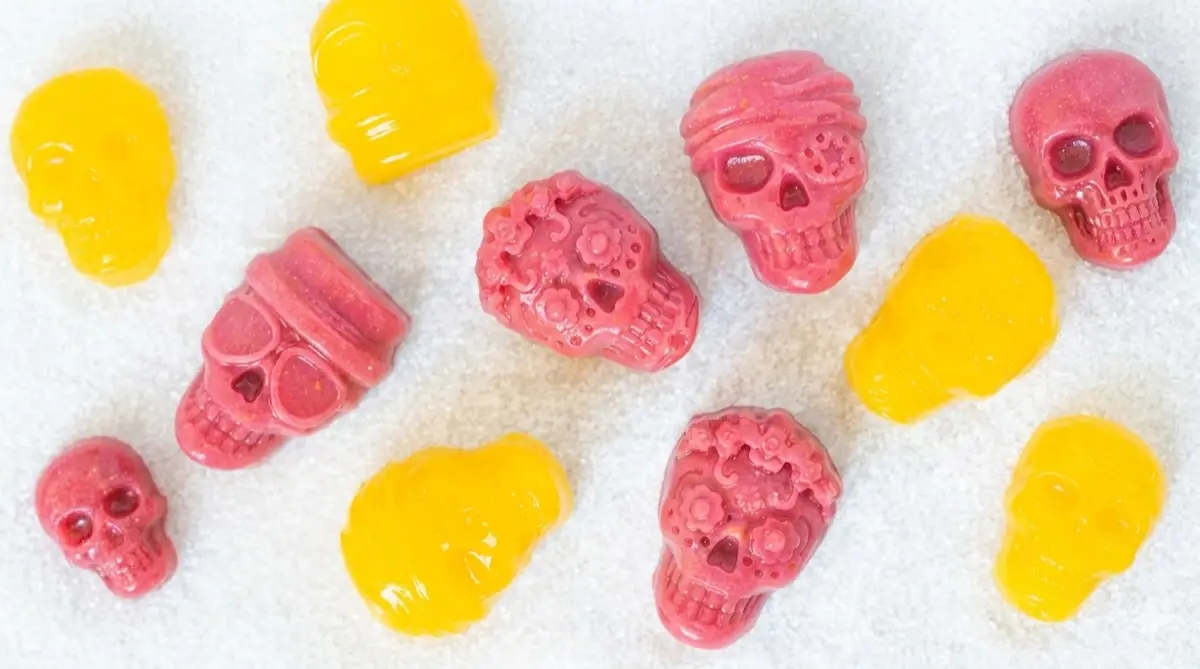
Right in time for the spooky season, these colorful gummies are delicious and an easy way to make a healthy Halloween or Día de los Muertos treat for the whole family. They come in two flavors: Orange and raspberry. For those with food allergies or sensitivities, get excited because these bad boys are gluten, dairy, and nut free, paleo and AIP.
Halloween Gummies
Ingredients
Method
- If you are doing both flavors you can use half of the ingredients each.
- Pour orange juice into a small saucepan. Sprinkle the gelatin powder on top, stir and let it bloom for a minute or so.
- Heat the saucepan on medium-low heat until the gelatin has melted. Use a whisk to make sure there are no lumps. Add the honey and mix well.
- Pour the mixture into molds and place it in the fridge for about an hour.
- Carefully remove the gummies from the molds. I recommend loosening all the edges first so nothing gets stuck.
- Enjoy or store in an airtight container on the counter for a few days or in the fridge for up to 2 weeks.
- Place the raspberries, coconut oil, and water in a blender and mix until smooth.
- Pour the mixture through a strainer into a small saucepan to get rid of the seeds. Sprinkle the gelatin powder on top, stir and let it bloom for a minute or so.
- Heat the saucepan on medium-low heat until the gelatin has melted. Use a whisk to make sure there are no lumps. Add honey and vanilla extract and mix well.
- Pour the mixture into molds and place it in the fridge for about an hour.
- Carefully remove the gummies from the molds. I recommend loosening all the edges first so nothing gets stuck.
- Enjoy or store in an airtight container on the counter for a few days or in the fridge for up to 2 weeks.
Why I love these Halloween gummies
Halloween used to be one of those holidays that stressed me out. If you or your kids have food restrictions, you know exactly what I mean. Everyone comes home with a bag full of candy that is basically corn syrup and artificial dye, and you are the one who has to say no.
That is why I love these gummies so much. There are only three real ingredients in them: fruit (either freshly squeezed orange juice or whole frozen raspberries), gelatin and a spoonful of raw honey. That is it. And the gelatin isn’t just there to make them set, it is also a great source of the amino acids glycine and proline, which is a lot more than I can say about anything that comes out of a candy bag.
They are also gluten-free, dairy-free, nut-free, egg-free, soy-free and nightshade-free, which makes them paleo and AIP compliant. So if your kid is normally the one who has to skip the candy bowl, this is a treat they can actually have.
How to get the gelatin right
This is the only step that can really go wrong, so let me walk you through it.
Sprinkle the gelatin over the cold liquid instead of dumping it in all at once. If you dump it in one spot it seals itself on the outside and stays lumpy no matter how much you whisk. Then let it sit undisturbed for a minute or two. Properly bloomed gelatin looks wrinkly and thick, kind of like applesauce.
Now heat it gently on medium-low and please don’t let it boil. Boiling damages the gelatin and you end up with a syrup that never firms up. You only want to warm it until the grains have disappeared. Lift your whisk and check: the liquid should look smooth and glossy without any grit. And if you still see a few lumps, simply pour the mixture through a fine strainer on the way into the molds.
One more thing about the ratio. A quarter cup of gelatin to one cup of liquid gives you a firm gummy that holds its shape on a snack table at room temperature. If you prefer them softer and more like a jelly candy, use three tablespoons instead.
Molds, shapes and natural colors
Silicone molds are the easiest option and by the end of September you will find Halloween shapes everywhere: skulls, pumpkins, bats, brains, you name it. But you don’t need them. Line a loaf pan or a small baking dish with parchment paper, pour the mixture in about half an inch deep, let it set in the fridge and then lift the whole slab out and cut it into cubes. You can also press out shapes with small cookie cutters.
The best part is that all of the color comes from the fruit itself. The orange juice sets into a bright translucent orange and the raspberry version (the one with coconut milk) turns into a soft pink. If you want the raspberry batch to look darker and more like blood for the occasion, add a tablespoon of beet juice. No artificial coloring needed.
How to store them
Keep them in an airtight container. They will last a few days on the counter and up to two weeks in the fridge, so you can absolutely make them three or four days before a party and check one thing off your list early.
They come out of the fridge quite firm and get chewier the longer they sit out, which is good to know if you are putting them on a table for the whole evening. Try to store them in a single layer, or place a piece of parchment paper between the layers so they don’t stick together. And please don’t freeze them. They get watery when they thaw and the texture never really comes back.
Halloween gummies FAQ
Can I make these Halloween gummies without honey?
Yes. Maple syrup works one to one and keeps them paleo and AIP. And if your orange juice or your raspberries are sweet enough you can leave the sweetener out completely. The gelatin sets exactly the same way and they taste more like fruit than candy. One important note: honey should not be given to babies under one year old.
Are these gummies vegan?
Unfortunately not. Gelatin comes from animals and it is the ingredient that makes them set, so there is no way around it. The usual plant-based alternative is agar-agar, about two teaspoons of agar powder per cup of liquid. Keep in mind that agar has to be boiled to activate (the opposite of gelatin) and that it sets much firmer and more brittle. You will get a sliceable jelly rather than a chewy gummy.
Why did my gummies not set?
There are three usual suspects. Either the mixture boiled, or there was not enough gelatin for the amount of liquid, or the fruit was working against you. Fresh pineapple, papaya, kiwi, mango and figs contain enzymes that break down gelatin and will keep your gummies liquid forever. Cooked or canned versions of those fruits are fine because the heat deactivates the enzyme, but don’t use them raw here.
Are Halloween gummies AIP compliant?
These ones are. There are no grains, no dairy, no nuts, no eggs, no nightshades and no refined sugar in either flavor. The only thing to look out for is the vanilla extract in the raspberry version. Use an alcohol-free vanilla and you are good to go.
If you are putting together a whole Halloween spread, these gummies go really well with my roasted pumpkin seeds (you carved the pumpkin anyway) and a batch of apple cider donuts. And if you need more ideas, check out my 10 healthy snacks and treats.
I would love to hear from you in the comment section below. Did you try them? Which flavor is your favorite? Make sure to share this recipe with your loved ones.
Leave a Reply